Creating models
On this page, I will be showing on my designs on a name tag and also a fidget spinner.
Nametag
Step 1
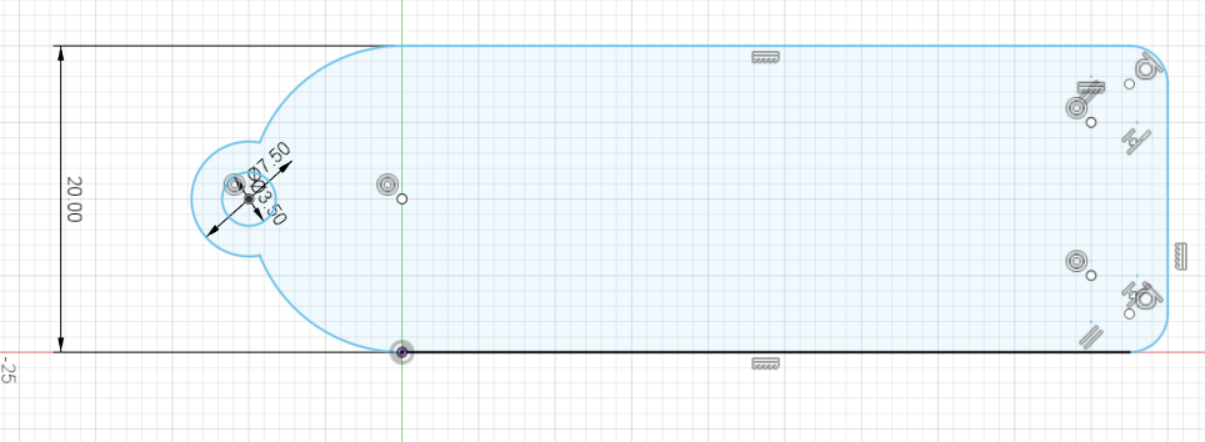
My first step is to create the outer layer of the nametag. First, sketch a rectangle of 50mm length and 20mm width. Next is to create a circle on the left side of the rectangle, with a diameter of 20mm. At the tip of the left side of the circle, add 2 circles. The first with a diameter of 7.5mm and the other with a diameter of 3.5mm
- Round the right side of the rectangle
- cut off the extra, not needed parts so that the sketch is cleaner to view
- the picture below shows the end product of step 1
Step 2
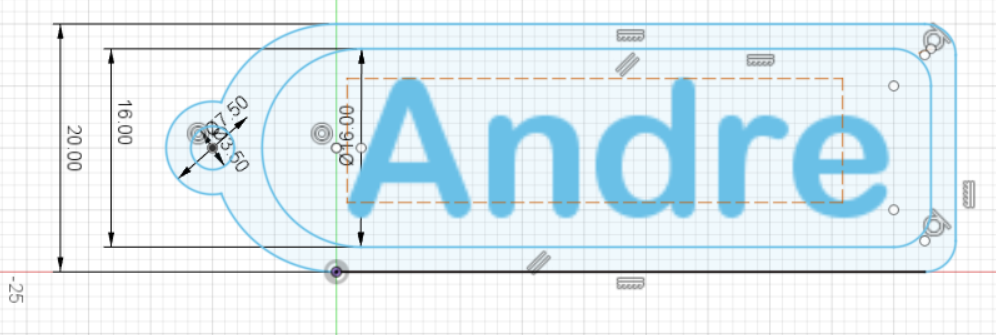
My second step is to create the inner layer of the nametag, where the name is in. First, indicate the length of space for the outer layer for the nametag. This can be done by measuring 2mm from each side until the semicircle part of the namtag. Next, create the inner rectangle followed by the inner circle which have the same width as the inner rectangle. Then cut off any parts that are not needed. Below is a picture that shows the end product of step 2:

Step 3
My third step is to create the name part for the nametag. It can be done by using the text function under create when sketching.
- Adjust the text by moving it or changing the font and font size
- Make sure the text is within the inner part of the name tag
- the picture below shows the end product of step 3
Last step
My last step is to extrude the sketch. The outer layer of the nametag and the name itself would be 4mm thick while the inner layer of the name tag is 3mm thick. The picture below shows the end product of this step
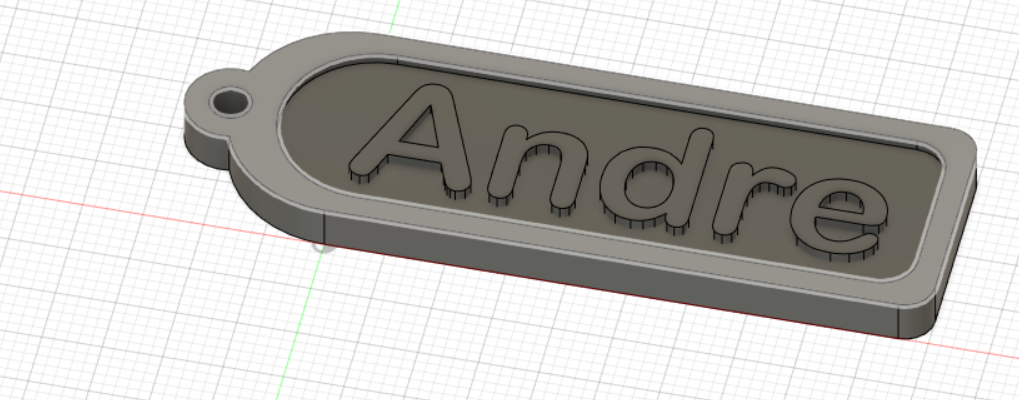
Done
This is it for the nametag creation for the assingnment creating models. I have embedded my work below and the fidget spinner creation is also below.
Fidget spinner
Step 1
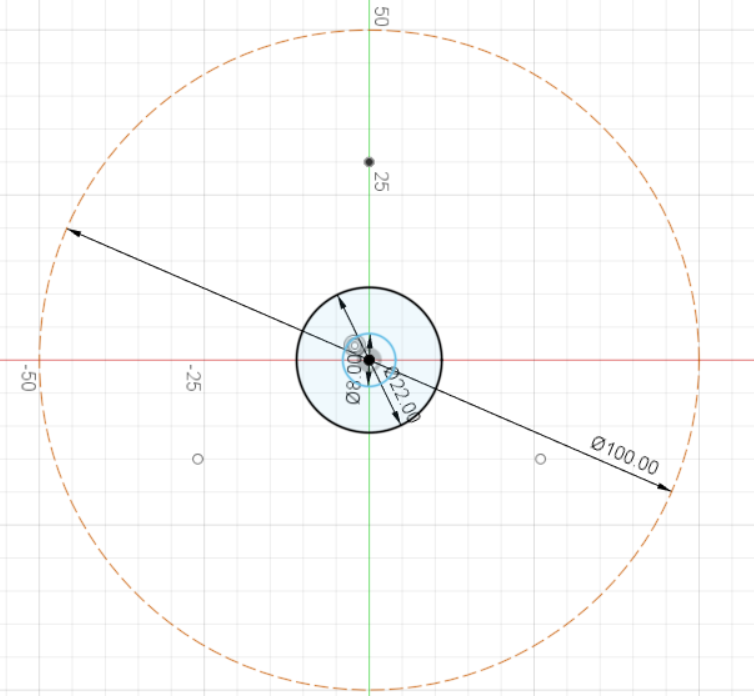
My first step is to define the length limits of the fidget spinner and the middle portion of the fidget spinner. The diameter limit for the fidget spinner is 100mm and the middle bearing is 22mm. The picture below is the end product for step 1:
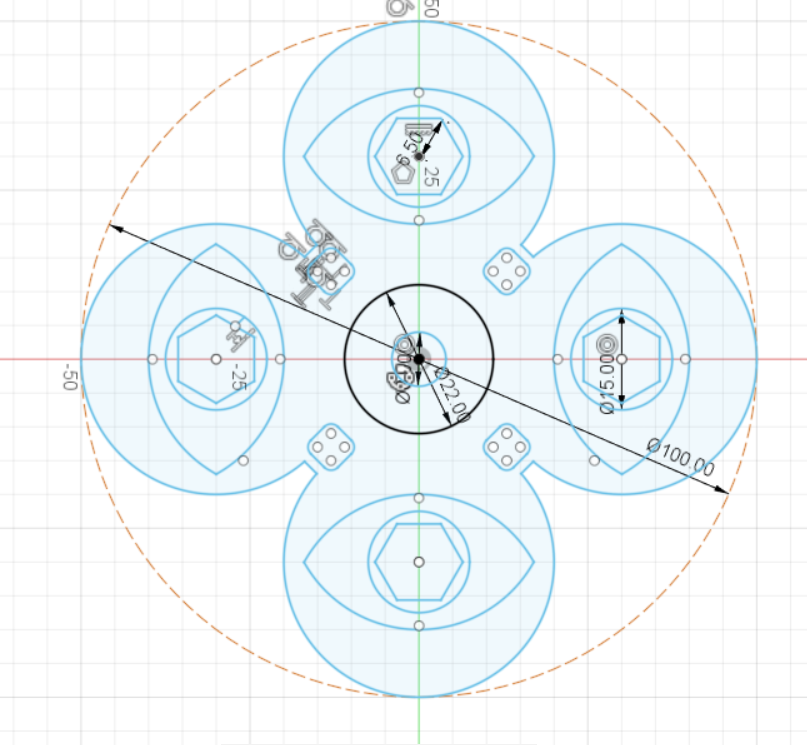
Step 2
My second step is to create the design of the fidget spinner. from the limit, I drew a line 20mm towards the middle point, this is where the nut for the fidget spinner will be. The nut have a radius of 5.629mm with 6 sides, and I put a holder for the nut, a circle with a diameter of 15mm. Next, I created a circle with a diameter of 40mm. To make the nut look like the middle of an eye, I created 2 arcs which are 3mm away from the edge of circle. Next, I used circular pattern, which can be found under create tab, to duplicate the design to have 4 of the same side. Then I cut out the extra parts and made connection between the circles with lines. As I am afraid the fidget spinner is too heavy, I cut out a small square piece at every corner, to also make it balanced. The picture below is the end product for step 2:
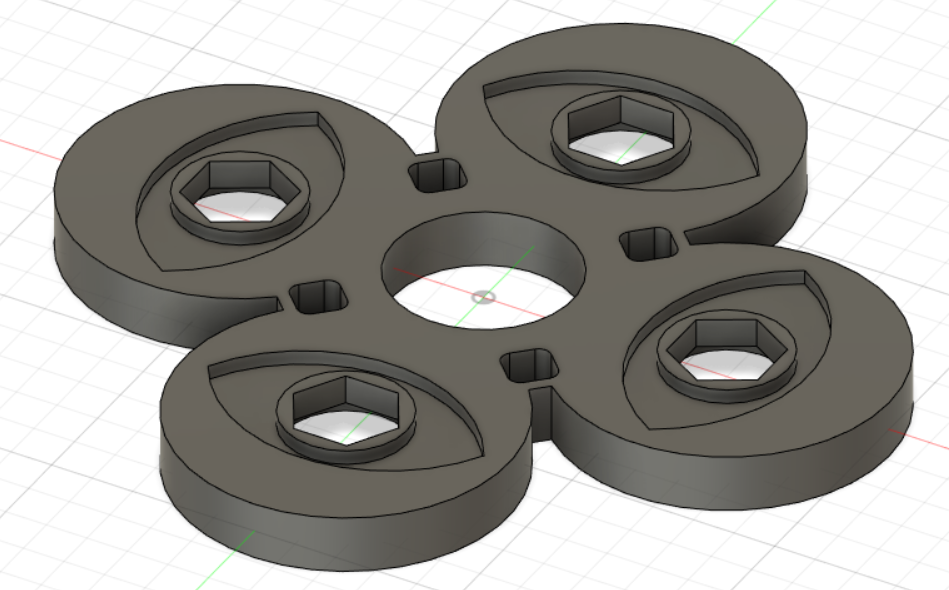
Last step
My last step is to extrude the fidget spinner. Using the extrude with symmertical, the body of the fidget spinner and the holder for the nut to be 8mm thick for one side and the eye shaped pattern to be 1.75mm thick for one side The picture below is the end product for this step:
Done
This is it for the design of the fidget spinner, I have embedded my design below: